Introduction
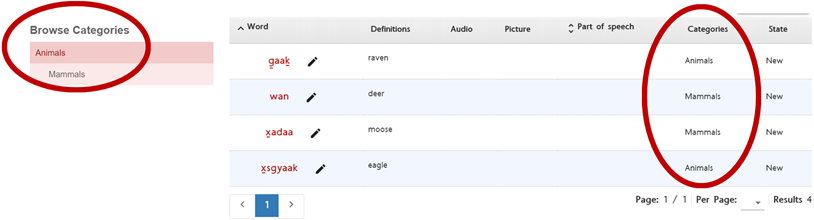
Categories are used to sort word entries into groups based on a shared characteristic. For example, 'moose', 'eagle', 'deer', and 'raven' can all be sorted as 'Animals'. You also have the option to have parent categories. This is when a broader category has more specific ('child') categories within it. For example, 'Animals' could be the parent category to 'Mammals'. Then, if you sorted 'moose' and 'deer' as 'Mammals', they would also be sorted as 'Animals'.
Only Language Administrators can add and edit categories. Before a recorder (or recorder with approval) can add a custom category to a word entry, it must first be created by a Language Administrator.
Tip
Categories cannot be added or edited from the word entry form. You must add your categories via the Categories section on your language site before they can be assigned to word entries.
Instructions
How to Add Categories
- Use your FirstVoices login and enter your Workspace
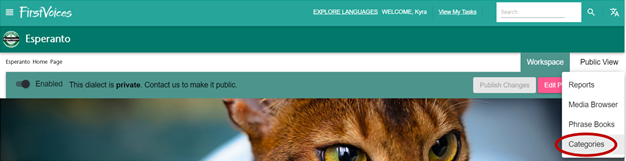
- Navigate the downward arrow next to the pink Edit Portal button to open the drop-down menu (see image above)
- Then, click Categories
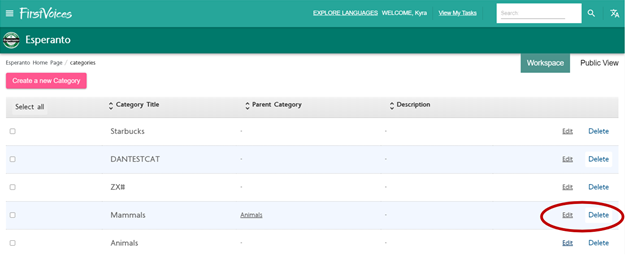
- Here, you can click Create New Category (see image below)
- Provide the required information to make your new Category
- You do not need to select a Parent Category unless you want to group sub-categories together
- Then, click Create New Category again

How to Edit Categories
- Use your FirstVoices login and enter your Workspace
- Navigate the downward arrow next to the pink Edit Portal button
- Then, click Categories
- Find the Category that you want to edit
- Click Edit on the Category that you want to modify
- Provide what edits you would like to make
- Click Save Changes when you are satisfied
How to Assign Categories
- Use your FirstVoices login and enter your Workspace
- Navigate to the word or phrases that you want to assign categorie(s) to
- Select the edit option (see image above)
- Navigate down to the Categories section
- Press Add Categories
- Here, you can browse and add categories to each entry
- Then, press Save
Instructional Video